Dominos Lava Cake
We introduce the story and simple appeal of a beloved molten dessert that started as a happy kitchen accident. Chef Jean-Georges Vongerichten invented the original version in the 1980s, and its warm, gooey center still delights home bakers and food lovers across the United States.
In this guide, we explore the history of the Dominos Lava Cake and show how you can recreate a restaurant-style treat at home. We cover the balance between a crisp outer shell and a flowing lava center, plus step-by-step techniques that keep the process approachable for novices.
Follow our professional tips and you will learn how to produce a rich chocolate dessert that rivals shop-bought quality. We keep instructions clear so both casual bakers and seasoned cooks can achieve consistent results and enjoy a rewarding baking project.
The History and Appeal of the Dominos Lava Cake
In the 1980s, Chef Jean-Georges Vongerichten pulled small chocolate desserts from the oven too soon. That early timing created a soft, molten center that quickly captured attention in restaurants and homes.
We study why this chocolate lava crunch became a quick, indulgent food for busy evenings. The contrast between a crisp outer crumb and a flowing middle feels luxurious without long prep time.

- A happy accident gave us the signature molten core.
- Precise baking time is the secret to consistent results.
- Our guide focuses on texture, not tricks, so home cooks can repeat the effect.
| Aspect | Desired Result | Timing |
|---|---|---|
| Outer Crust | Lightly crisp, set | Short bake, 8–10 minutes |
| Center | Velvety, flowing | Pull early, rest 30 sec |
| Serving | Warm, immediate | Serve within 5 minutes |
Mastering timing gives reliable homemade cakes that match the restaurant feel. With practice, we can recreate the chocolate lava cake texture and satisfy any craving for a rich, quick dessert.
Essential Ingredients for Your Homemade Chocolate Dessert
Quality ingredients determine texture and flavor in every bite. We pick items that help the center remain molten while the outer shell sets. Small changes to fat, egg content, or flour alter the final result quickly.
Selecting Quality Chocolate
Choose chocolate with 50–60% cacao for balanced bitterness and sweetness. This range gives depth without overpowering sugar or cream in the ganache and batter.
We recommend chopping the bar by hand for even melting. Use a medium glass bowl to combine melted chocolate with cold unsalted butter for a smooth mix.

The Role of Egg Yolks
Egg yolks add fat and richness that make the batter fudgy. For the underbaked version, use two large egg yolks alongside whole eggs to bind ingredients and improve mouthfeel.
Measure flour precisely—about 20g—to keep structure without losing the flowing center. Add a pinch of salt and a splash of vanilla extract for balance.
- 115g cold unsalted butter provides richness and structure.
- Use sugar sparingly to avoid a cloying finish.
- A medium glass bowl ensures even mixing of batter and cream.
| Ingredient | Amount | Purpose |
|---|---|---|
| Chocolate (50–60% cacao) | 100–120g | Flavor depth |
| Cold unsalted butter | 115g | Structure, richness |
| Flour | 20g | Hold shape |
Preparing the Perfect Ganache Center
For a reliable molten center, we focus first on a silky ganache that holds shape in the freezer.
Heat 6 Tbsp of heavy cream in a saucepan until it reaches a bare simmer. Pour the hot cream over 70g of finely chopped bittersweet chocolate and let sit for 60 seconds.
Whisk the mixture until smooth. Add a pinch of kosher salt and 1 tsp vanilla to balance sugar and deepen flavor.

To finish, chill the ganache at least 30 minutes so it firms into a small ball. This chilled center will soften during baking and create the molten core.
- Use a double boiler or microwave to melt butter and chocolate for a glossy mixture.
- Grease ramekins with butter, then dust with flour to ensure easy release from the pan.
- Form ganache portions in a bowl, freeze briefly, then place into batter before baking.
| Step | Key Action | Timing |
|---|---|---|
| Heat cream | Bring to bare simmer in saucepan | 1–2 minutes |
| Combine | Pour over chocolate, whisk smooth | 1 minute |
| Chill | Set ganache into firm ball in fridge | 30+ minutes |
Mixing the Rich Chocolate Batter
To get the right rise and fudgy interior, we start by aerating the eggs and yolks until pale and voluminous. Using a hand blender with the whisk attachment, we whip whole eggs and egg yolks until the mixture doubles in volume. This step traps air that supports cakes while preserving a dense, molten center.
Incorporating Air for Structure
We melt 165g of bittersweet chocolate with 115g of cold unsalted butter in a saucepan, stirring until smooth. Let the melted butter and chocolate cool slightly before folding it into the whipped eggs so we don’t deflate the batter.
- Whip eggs and yolks with a hand blender until light and doubled.
- Gently fold the cooled chocolate-butter mixture into the bowl to keep air intact.
- Add flour and a pinch of salt with soft, deliberate folds; the batter should be thick and pale yellow.
Finish with vanilla extract and any remaining ganache pieces folded in. We suggest chilling the batter for at least 20 minutes to help the top form a slight crunch during baking. Bake in a hot oven so cakes set quickly on the outside while the center remains molten.
| Step | Action | Timing |
|---|---|---|
| Whip eggs | Use hand blender to double volume | 3–4 minutes |
| Combine chocolate | Melt chocolate and butter in saucepan, cool | 5 minutes |
| Chill batter | Rest before baking for crisp top | 20 minutes |
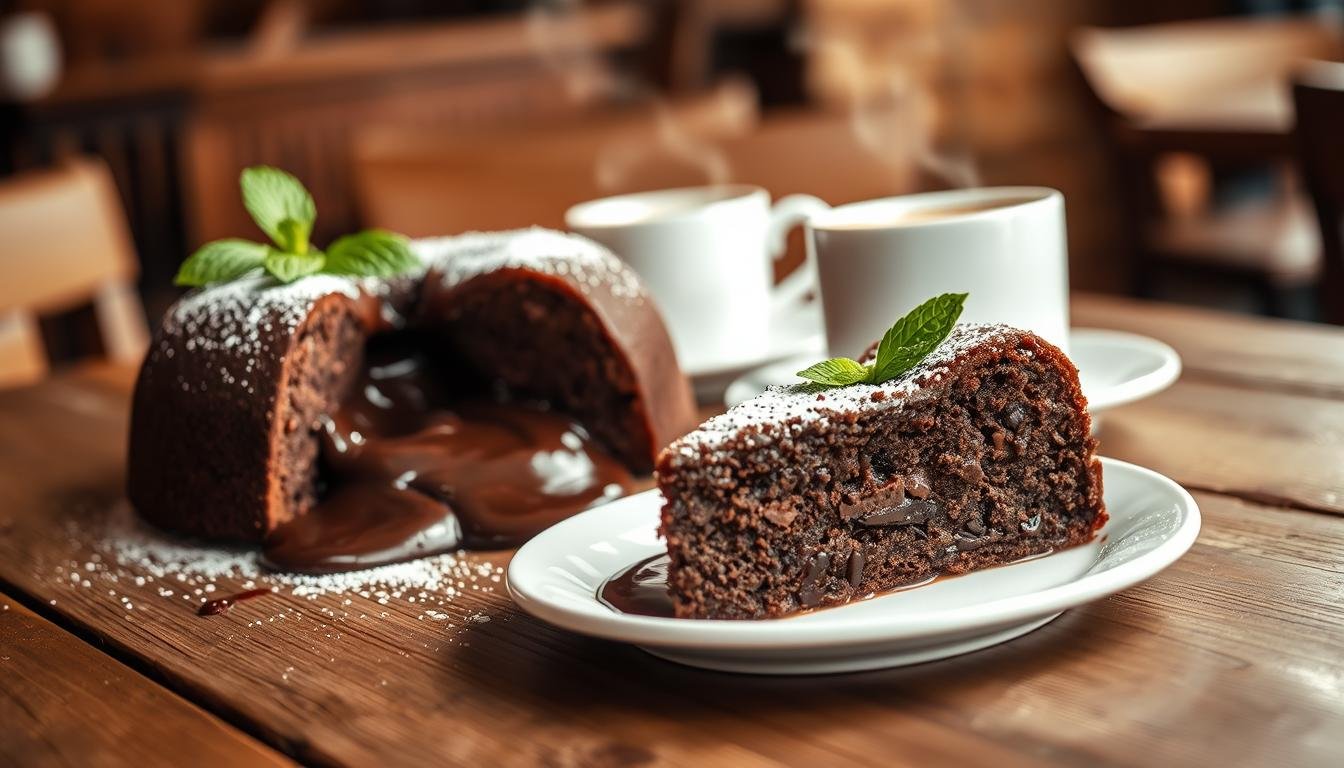
Baking Techniques for a Gooey Lava Crunch Cake
A fast, high-heat bake is the key to a crisp exterior and molten center in our lava crunch dessert.
Preheat oven 450°F (230°C) so the top and edges set quickly. Use a double boiler to melt chocolate and butter. That keeps the mixture smooth and prevents seizing.
Bake the cakes for 10–11 minutes. The outside should look set while the center still jiggles when you shake the pan gently.
- Let cakes rest 1 minute before loosening the edges with an offset spatula.
- Monitor the oven in the final minutes; the top should bounce back slightly when poked.
- Dust with powdered sugar for a professional finish before serving warm.
| Step | Temperature | Timing |
|---|---|---|
| Preheat oven | 450°F / 230°C | — |
| Bake cakes | High heat | 10–11 minutes |
| Rest & release | Room temp | 1 minute |
Follow these techniques and your ganache-filled batter will deliver the chocolate-rich, molten center with a crackly top every time.
Pro Tips for Achieving the Ideal Texture
Attention to chilling and timing transforms a good batter into a professional-quality treat. Small steps at the end of the process lock in a crisp top and a flowing center. We focus on three practical areas: chilling, oven control, and avoiding overbaking.
The Importance of Chilling
Chill the batter at least 20 minutes to help the top set quickly in the oven. For best results, chill twice: once after mixing and again briefly after portioning into the pan.
Cold batter firms the ganache core and helps the outer shell become slightly crunchy while the center melts.
Managing Oven Temperatures
Always preheat oven 450°F before baking. High initial heat sets edges fast and preserves the molten middle.
Check oven calibration with a thermometer. Small fluctuations change baking time and texture.
Avoiding Overbaking
Whip egg yolks well to build structure that supports the molten center. Use a hand blender so vanilla and other flavorings disperse evenly.
Set a timer and pull the cakes the moment the edges are firm and the center still jiggles. Rest for one minute before releasing from the pan.
- Chill batter twice for a firmer crust.
- Use a timer to prevent overbaking.
- Verify oven temp to avoid a runny or dry result.
| Tip | Impact | Timing |
|---|---|---|
| Chill batter | Crunchy top, stable center | 20 minutes |
| High heat | Set exterior, molten core | preheat oven 450 |
| Timer pull | Avoid overbake | 10–11 minutes |
| Whip yolks | Structure without extra flour | 3–4 minutes |
Enjoying Your Decadent Homemade Creation
We recommend serving soon after baking so the warm ganache center stays flowing. After you let cool the cakes for 2 minutes, use a knife to carefully loosen the edges cake, then invert each ramekin onto a plate.
Dust with powdered sugar for a bright contrast to the dark chocolate. A small pat of butter or a scoop of vanilla ice cream pairs well and balances sugar and richness.
Store finished cakes in an airtight container for up to 4 days. To reheat, warm in a 350°F oven for 3–4 minutes or microwave for 1–2 minutes. We hope you enjoy sharing this food with friends and family, knowing your ganache and batter timing created the perfect molten center.